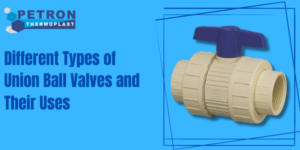
A 3-way ball valve PVC allows water, gas, or any other liquid or gas to pass freely in three possible directions: left, right, and straight through the valve. Installing one of these valves requires the same basic steps, whether working with PVC pipe or any other type of pipe, but this article will focus on installation with PVC pipe and fittings. Here are the steps you’ll need to follow to correctly install a 3-way ball valve on your PVC pipes from Petron Thermoplast. You can search in the market and search online about the best possible 3 way pvc ball valve price.
Overview
PVC (Polyvinyl Chloride) piping is one of the most common materials used in construction for indoor and outdoor applications. PVC stands up well against various chemical reactions and doesn’t rust like iron or other metals might over time. However, what makes PVC so useful also means it can be difficult to work with if you aren’t familiar with proper installation techniques. Understanding how PVC 3-way ball valves work is key to properly installing them on your plumbing line or water valve installation project. If you plan on working with PVC on your next home improvement job, you must have a solid grasp of how these valves operate before beginning.
How to Avoid Mistakes?
A 3-way ball PVC valve India is a common component of plumbing systems. Although installation can be straightforward, there are some steps you should take to avoid mistakes. First, before installing a 3-way PVC ball valve, ensure your pipes have been cut to exact specifications. You can find these specifications in most installation guides or measure and note each pipe’s length on your floor plan. Second, use steel wrenches or sockets when tightening nuts and bolts; don’t rely on pliers or vise grips to tighten them down. Finally, ensure that all parts are installed correctly and completely—if any part is missing or damaged, you may end up with leaks or other problems. If it seems like you’re getting ahead while reading installation instructions for a 3-way ball valve, take a deep breath and relax. There is no need to rush through any step of an installation process—there is always time to double-check everything as long as you move methodically through each stage of your project. And remember: if something doesn’t seem right along the way, stop what you’re doing until it does feel right!
Needed Tools
PVC and stainless steel 3-way PVC ball valve India is easy to come by, but you’ll need a few extra items for installation. You’ll also need basic hand tools to complete tasks like connecting pipes with threaded ends and installing nuts on pipes that have threaded ends. Finally, getting out your measuring tape is important for ensuring everything fits before connecting anything permanently. These tools may be all you need: 1/2 inch pipe wrench, adjustable wrench, socket wrench set with extensions (2 to 3 inches), pliers, screwdrivers, PVC primer and cement glue, safety glasses, or goggles…
Materials
A 3-way ball valve is an important piece of equipment for your irrigation system. The valve allows you to control water flow, so it’s crucial to install it correctly. 1) Cut off the excess pipe with a PVC cutter or hacksaw, and remove burrs from the inside with a file or emery cloth. 2) Use Teflon tape and wrap it tightly around the threaded joint of the new ball valve. 3) Secure the 3-way ball valve in place with a set screw. 4) Test by turning the handle clockwise until all 3 ports are closed; then counterclockwise until only port B is open. 5) Remove the plug from the bottom of the 3-way ball valve, fill the cavity halfway with water, replace the plug, and test again. 6) Securely attach a 3-way ball valve to the nearby structure using hose clamps (if needed). 7) Attach garden hoses to each port on a 3-way ball valve using compression fittings (if needed). 8 ) Turn the handle clockwise until all ports are closed; then counterclockwise until only port B is open. 9 ) Adjust sprinklers as needed by turning the handles on the sprinklers themselves.
Installing the Valve
A 3-way PVC ball valve, like any other PVC pipe fitting, is easy to install. First, measure and cut your PVC pipe to length using a hacksaw or pipe cutter and then remove all burrs with a utility knife. Next, slide in a compression washer followed by a regular washer, and then tighten an escutcheon nut on top of it. Slide another compression washer onto your supply line at least 3/4 inch away from where you’ll attach it to your faucet or drain system. Press on another regular washer, followed by another escutcheon nut. Insert a rubber O-ring on one side of the ball valve (refer to illustrations) between two more escutcheon nuts, then tighten them together.
Finishing Up
3-way ball valve PVC is ideal for controlling water flow in commercial and residential settings. In addition to regulating water pressure, 3 way PVC ball valves also help you conserve energy by slowing down your faucet’s flow rate. To make installation even easier, these valves come with two different threaded inserts: one to fit a 1/2 PVC pipe and another that’s compatible with a 5/8 pipe. If your home doesn’t have a three-way valve on your water line, installing one yourself is relatively simple (and inexpensive). If you want to install it at your residence, you can call the experts of Petron Thermoplast, the best thermoplastic product manufacturer in India.
You can also see – Custom Plastic Injection Molding | Machined Parts


Pingback: เช่ารถตู้พร้อมคนขับ
Pingback: เว็บ HUAY แด๊ดดี้ มีหวยอะไรน่าเล่นบ้าง
Pingback: ข้อดีของ วิธีดูค่าน้ำบอล มีอะไรบ้าง ?
Pingback: remisolleke
Pingback: เว็บตรงสล็อต
Pingback: 纸飞机下载
Pingback: ET
Pingback: protein
Pingback: serviços informáticos empresas